More than 50% of B2B marketers report bigger budgets
53 percent of B2B marketing managers have said that their organization’s marketing budget has been greater in 2023 than during 2022, with the most frequent budget increases coming to AI technologies, while social media marketing was seen as the most popular digital marketing strategy, according to newly-published survey data. MarTech
What’s Keeping CMOs Up at Night? [Study]
When it comes to the primary concerns chief marketing officers are facing, marketing’s return on investment (ROI), recession fears, and rising pressure to boost profits were the leading challenges, according to recently-released survey data of interest to B2B marketers. ANA
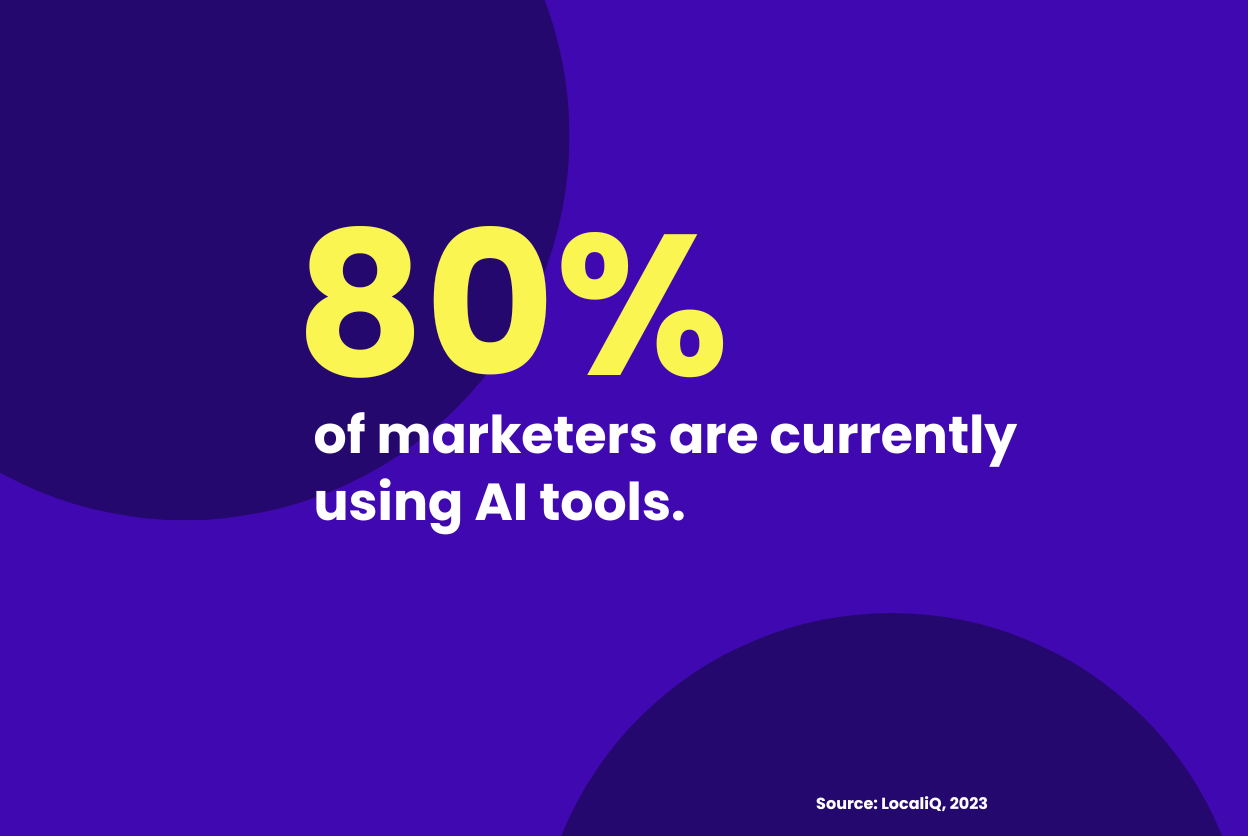
How Marketers Are Using Generative AI [Infographic]
80 percent of marketers have said that they are making use of AI tools, with the top categories of content being generated using AI being email copy and social media messages, while 64 percent of businesses have said they expect AI to boost organizational productivity — three of numerous statistics of interest to digital marketers contained in newly-released survey data. Social Media Today
Martech stacks and staff are stabilizing, thanks to both better integration and budget pressure
42 percent of marketers have said that they switch marketing technology programs in order to use new features not available in their existing apps, with 25 changing apps to achieve smoother integration into their organizational processes, while some 22 percent noted switching for cost savings, according to recently-published survey results. Chief MarTech
Twitter Analytics The Latest Victim Of Musk’s Paywall?
X, the rebranded social media platform formerly named Twitter, has removed some of the most relevant analytics data related to content performance on the platform, while noting that an updated version was in the works with an as-yet-unspecified implementation date, X recently announced. Forbes
AI Server Market to Reach $150 Billion by 2027 – Foxconn
When it comes to AI and the servers used to power much of the technology, the market is expected to expand from $30 billion in 2023 to $150 billion by 2027 — potentially placing AI servers near the overall market value of traditional servers, according to newly-published forecast data of interest to B2B marketers. AnandTech
Instagram is internally testing the ability to create Reels up to 10 minutes long
Meta’s Instagram social media platform has tested an increase in the maximum length for its Reels video content from three minutes to 10, a move that would offer influencers and creators new opportunities on the platform, as it continues efforts to compete with short-form video specialty platform TikTok. TechCrunch
New Research Shows Social Media Data Is The Driving Force For Business Intelligence Among Most Organizations
93 percent of business executives have said that social media data and the insights it provides will be a top source of business intelligence in the future, while 86 percent noted that social data already contributed to overall business strategy at their organization — two of numerous findings of interest to B2B marketers contained in newly-published social media report data. Forbes
Digital CPMs Plummet, 2H Rebound Expected
The cost of digital advertising as measured by cost per thousand impressions has decreased 49 percent from 2022 to 2023 year-over-year among online businesses in North America, while website traffic numbers climbed by eight percent during the same period, according to recently-released digital advertising report data. MediaPost
Universal Analytics still processing data two months after ‘sunset’
Search giant Google has encountered ongoing challenges as businesses have been slow to adopt its new Google Analytics 4 data analysis platform, and the firm has been increasingly urging users to make the switch from its longstanding and soon-to-be-retired Universal Analytics system, Google recently announced. MarTech
ON THE LIGHTER SIDE:
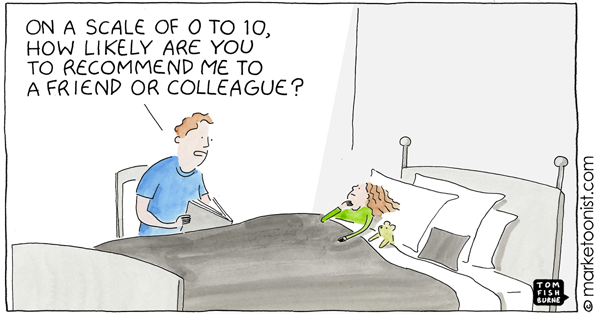
A lighthearted look at “Ratings Fatigue” by Marketoonist Tom Fishburne — Marketoonist
High-speed AI drone beats world-champion racers for the first time — Ars Technica
TOPRANK MARKETING & CLIENTS IN THE NEWS:
- Lane R. Ellis / TopRank Marketing — Hybrid Artificial Intelligence in Future B2B Marketing — LinkedIn Pulse
- Lee Odden / Donna Robinson — TopRank Marketing gears for growth with new CEO Donna Robinson — Minneapolis/St.Paul Business Journal
FRIDAY FIVE B2B MARKETING FAVORITES TO FOLLOW:
Jenn VandeZande @jennvzande
Chloe Thompson @ChloeIQ
Sharon Lichten-Stenger @SharonStenger4
Tom Rowe @thefrontrowe
Bean Porter @bean_miller
Learn more about TopRank Marketing‘s mission to help elevate the B2B marketing industry.
Have you come across your own top B2B marketing news item we haven’t yet covered? If so, please don’t hesitate to drop us a line in the comments below.
Thank you for joining us for this week’s Elevate B2B Marketing News, and we hope that you will return next Friday for another array of the most up-to-date and relevant B2B and digital marketing industry news. In the meantime, you can follow us on our LinkedIn page, or at @toprank on Twitter for even more timely daily news.